Spell Effects

I have a lot of actual work to do. I have 2 deadlines for edits that I need to hand in and some website work I need to do to get my site here cleaned up a little. Add a couple of professional touches that I am missing. I just wasn’t feeling it today. As happens so very frequently of late, I couldn’t sleep. My body is still in rebellion about something with aches, pains, and lots of other unpleasantries. So when I finished my second cup of coffee this morning I decided that some crafting was in order. Take on a small project, finish something and see if that would help.

My project of choice today was creating area of effect / spell effects for my D&D game. I picked a handful of spells and set about trying to make them in a form that we can just drop on my shiny new dungeon tiles next time we get to play.

Sculpting things with hot glue is an art form. It takes practice. I gathered up the stuff I needed and laid things out. The spells I decided to create for were web, Evard’s black tentacles, entangle, flaming sphere and wall of fire. I’d seen a video talking about how to go about making most of these before and they felt like things I could handle.
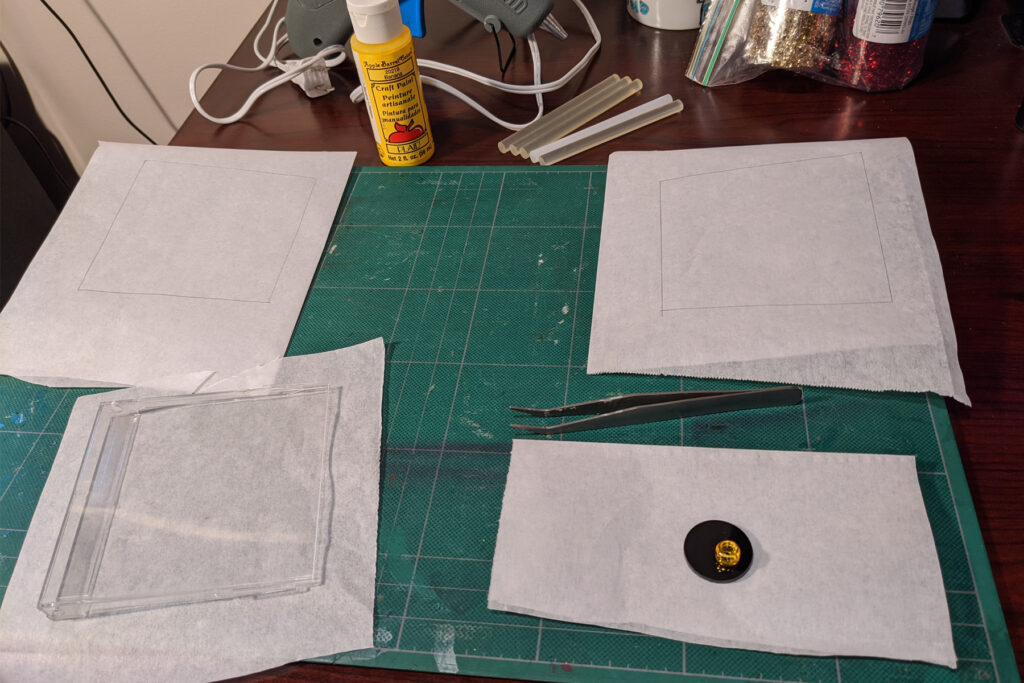
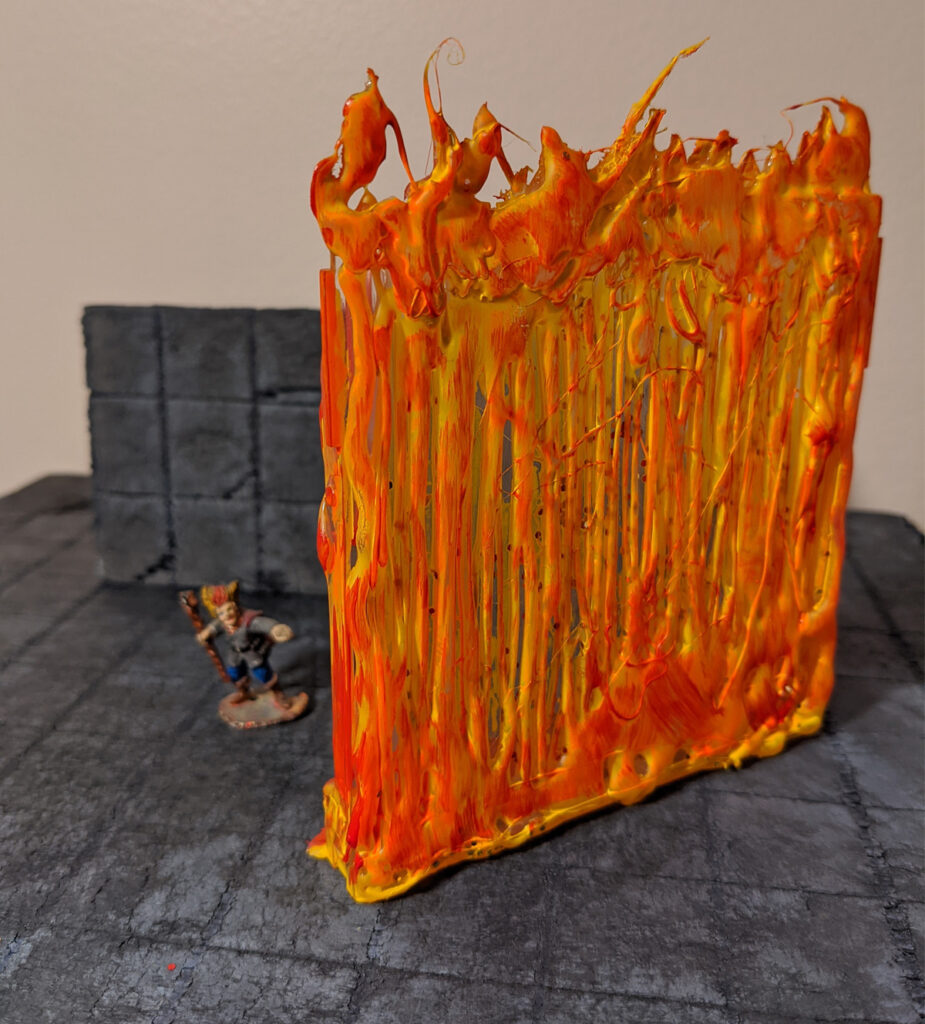
I hadn’t seen the wall of fire before. I’d seen a magic circle spell effect. The concept was the same and, as luck would have it I found this old, flat computer disk case in the bits box. I figured I’d pull it in half and each half would be it’s own wall. I popped on some safety glasses and went after the one side with my craft snippers. Safety glasses were a very good idea, trying to snip parts out of brittle plastic… not so much. After completely destroying one half of the box I decided that minimal changes to the other side was the way to go. I liked the fact that is has a square edge that will help it stand without some kind of crazy extra base addition.

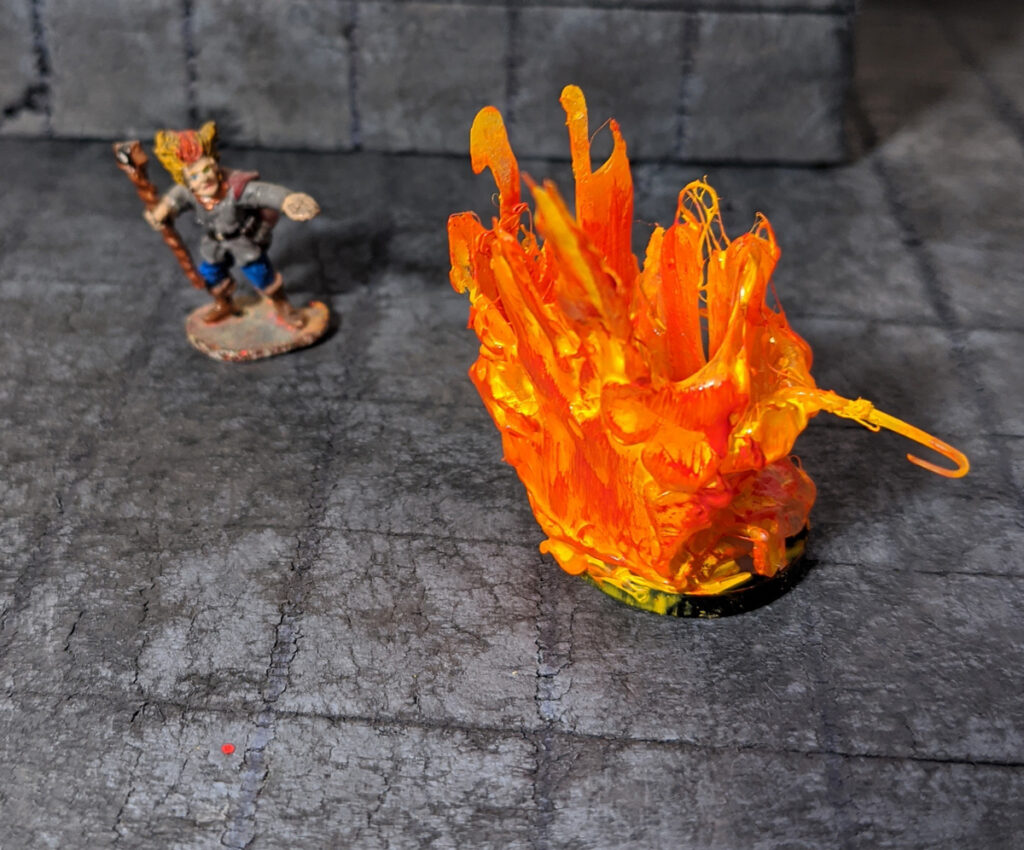
I also had this thought about the flaming sphere. I was going to use a miniature base and start with a clear pony bead. I also planned to sprinkle a little bit of glitter into the glue as it was cooling. I figure that each of these things is a magic spell effect and a little glitter wouldn’t hurt. I thought I could start with a little bit of glue in the center of the base, pop the bead on there then start working my “sphere” outward from there. As it turns out, gravity was not my friend here. It made everything droopy and very non-sphere like. I changed tactics. I laid out a flat set of flames on the parchment paper and decided to curl that around the round mini base. The effect would be less “sphere” but it would still give the idea. I went with it.
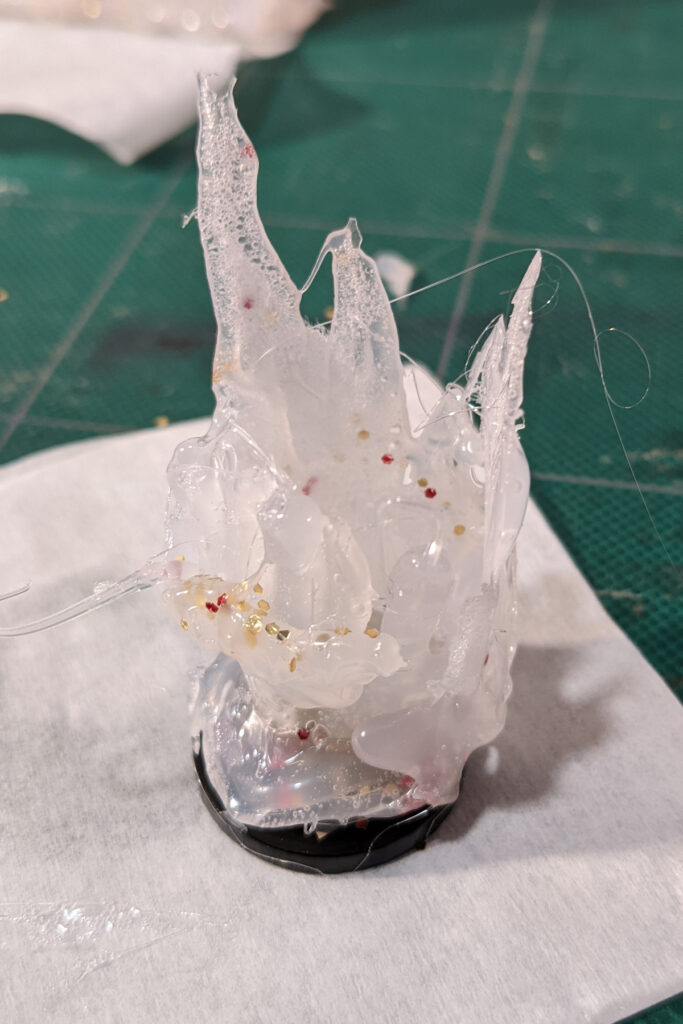
Not so spherical

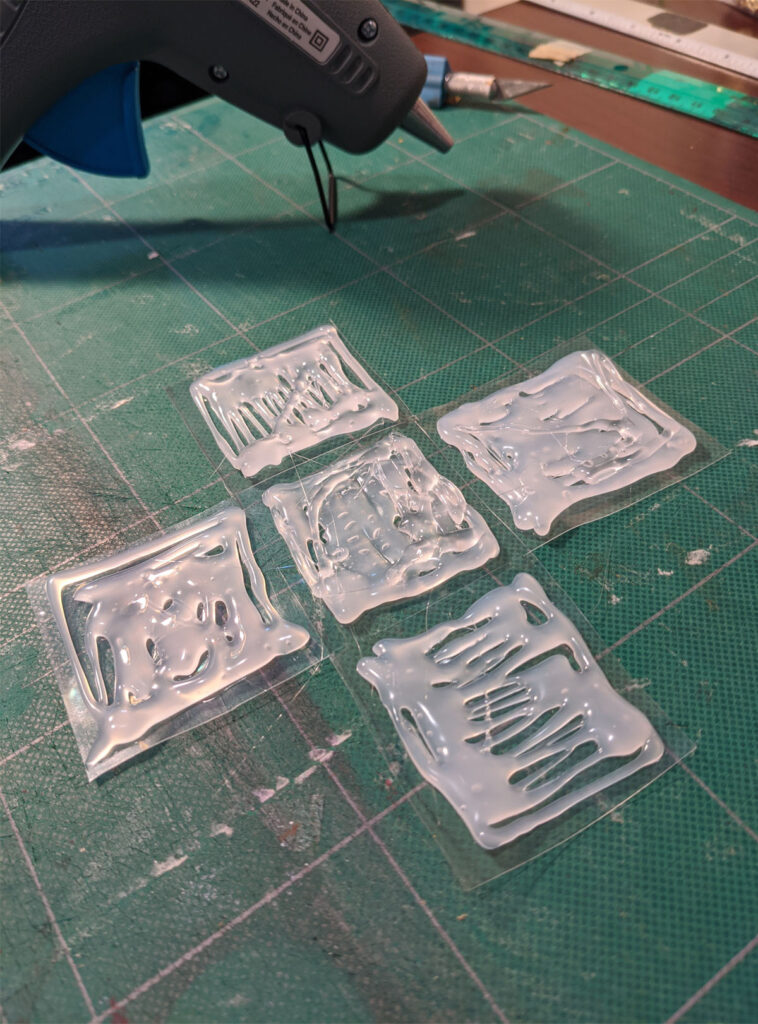
Forged ahead and started laying out the squares for the area effect things like web, tentacles and entangle. Normally parchment paper is really great for not sticking to the hot glue. This time for some reason, when I laid out my squares the paper just would not let go of the glue. I did what I could and pulled them all apart once they were dry. Moving from piece to piece while waiting for things to dry was a big help. This is a definite bonus to multitasking.
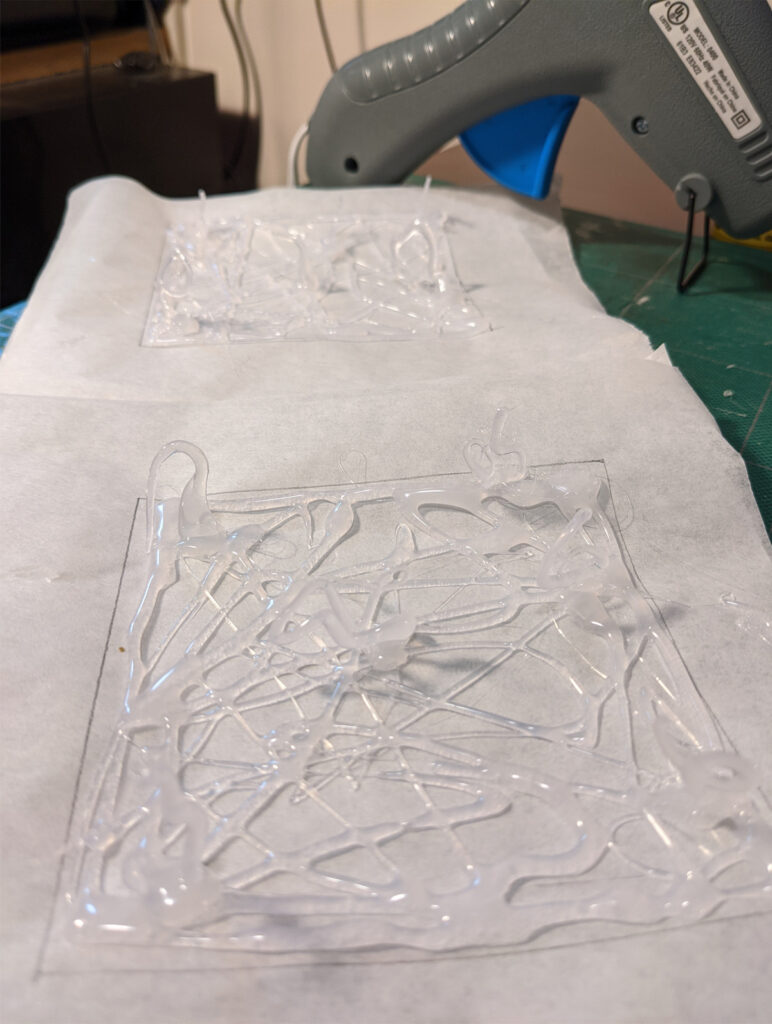
Hot glue – the keyword is still “hot”

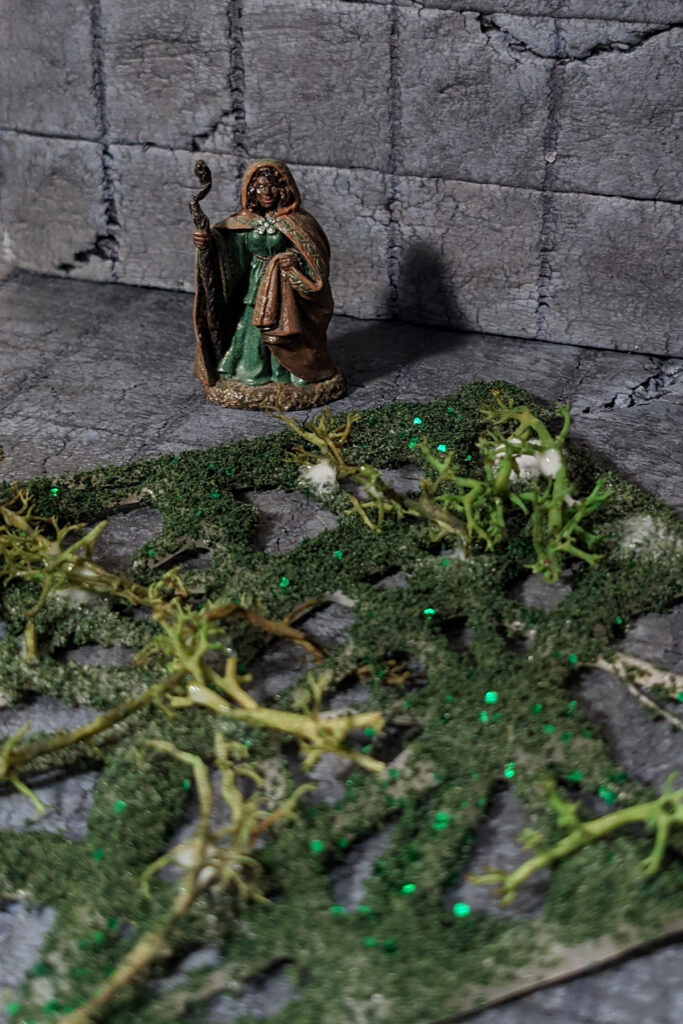
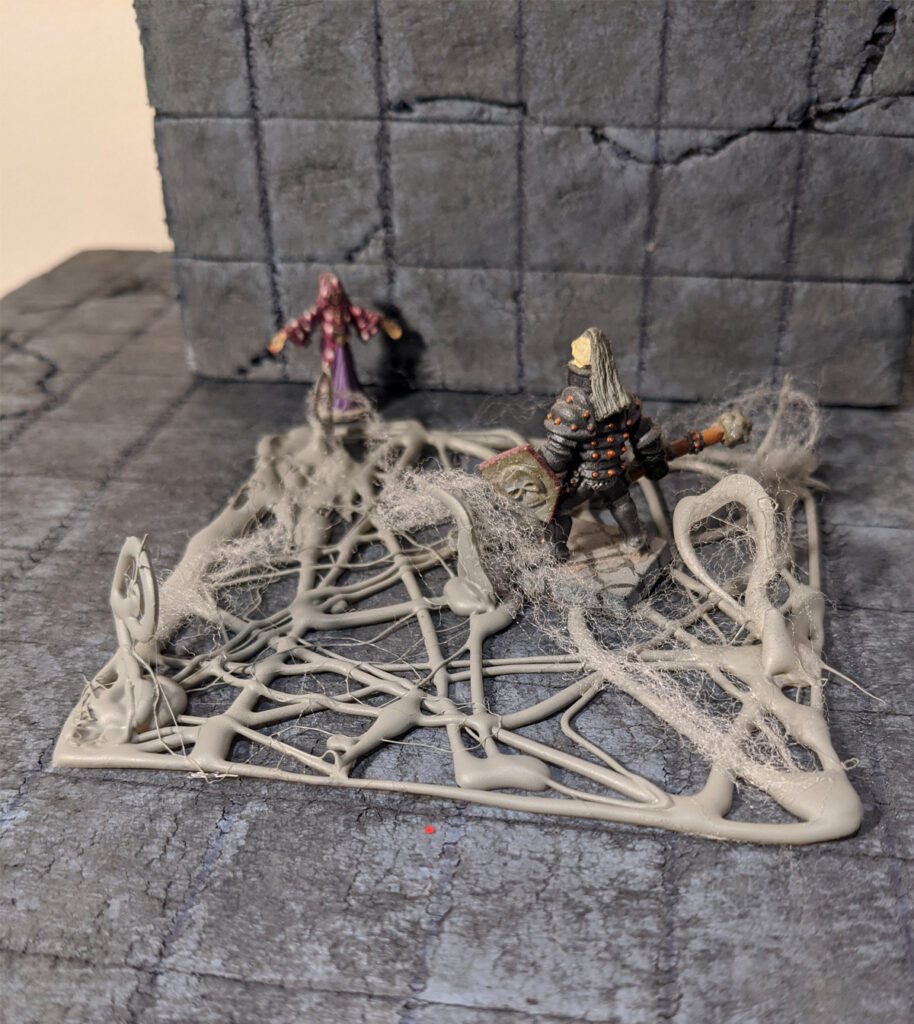
I gave a little bit extra to each of my squares. Some of it worked, some of it really didn’t. I used glow in the dark paint under the entangle spell. I added a little green glitter in with the flocking. I tried to get one or two extra bits of vine to stick and stay. The glow works where you can see it, if it’s dark enough. The flocking doesn’t look as great as I want it to and the vines just keep flopping off no matter what glue I use. I spray finished the whole thing and I’m just going to hope for the best. I added a little webbing from our Halloween decorations to my area effect for the web spell. I only painted the tentacles… and they seem to have turned out the best.

Painting the wall of flame and the flaming sphere worked out pretty well I think – and the wet palette actually is a super cool way to handle paints. I now understand why so many folks talk it up. I needed to take a break in the middle of these projects and when I got back all the pain was just as if I hadn’t left at all. I’ll be looking to the wet palette from now on.
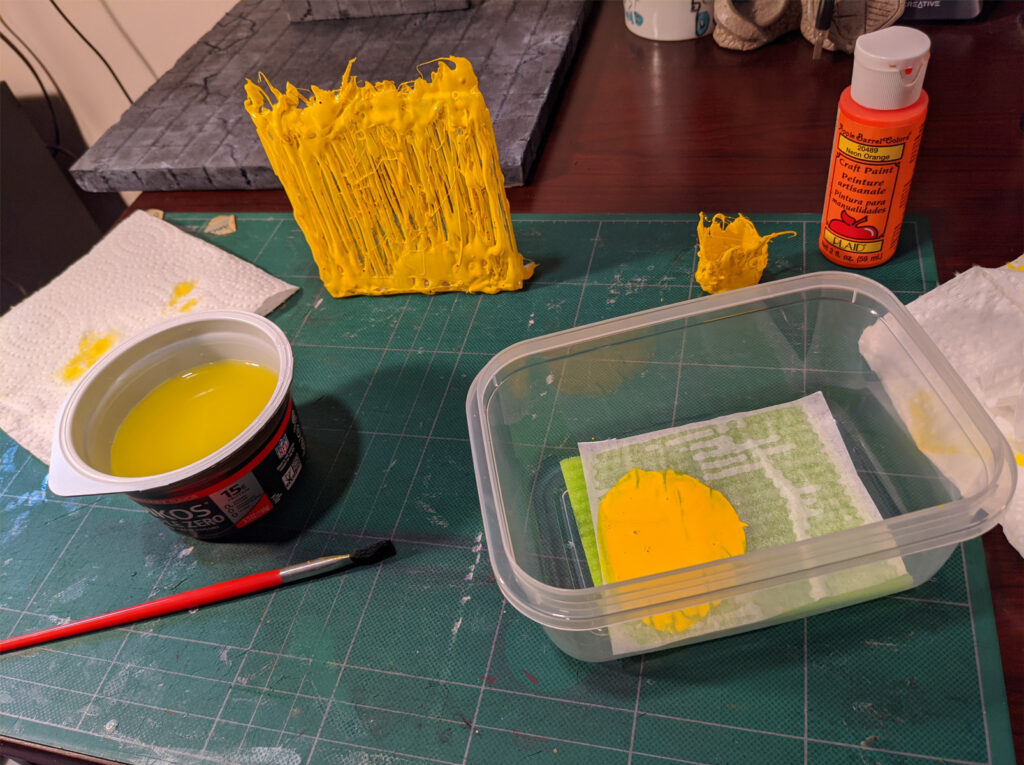
I probably need to resize my wet palette

I struggled with various parts of each of these projects. The biggest issue I have still, is patience. I’m working very hard at getting better with this. Paint needs time to dry. Glue needs time to dry. Hot glue needs time to dry of you’ll burn your damn finger… again. Sometimes the effect you think will be great doesn’t work out that way. It’s a learning process. I’m looking forward to doing a lot more learning on these sorts of projects moving forward.

Here are some of the finished looks:
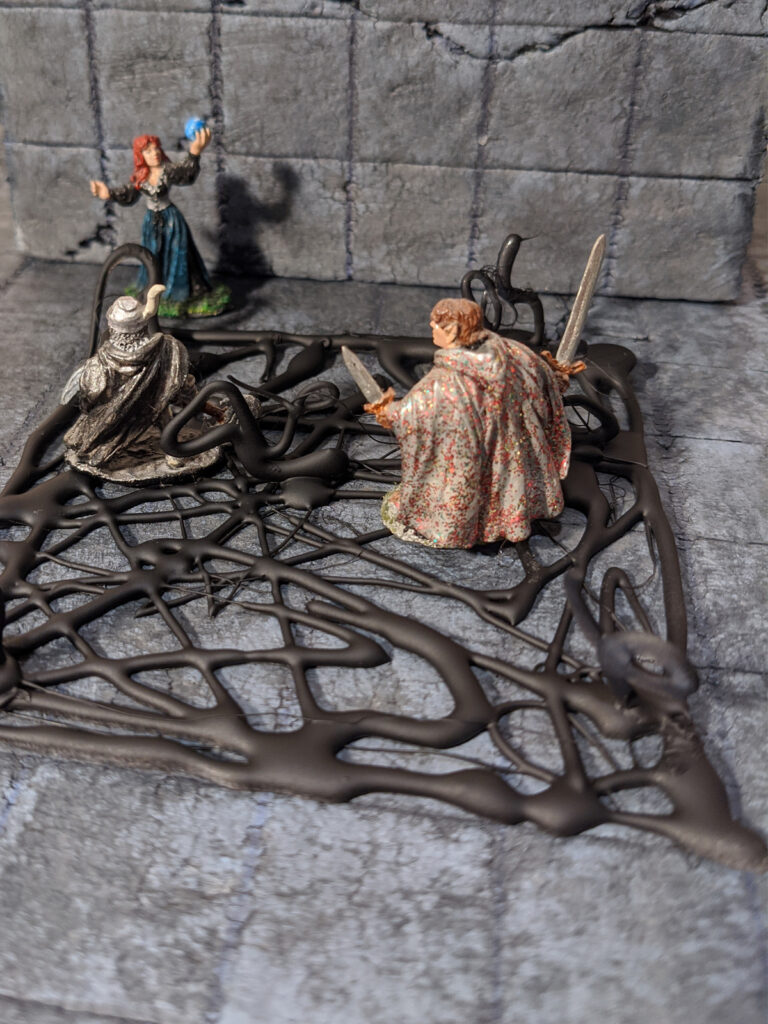
Sinister Black Tentacles
Entangle, magically wrapping you in nature
Web, tangled up and waiting for a spider
Fairly non-spherical flaming sphere
An imposing wall of flame!

Tiling

When I was a kid playing Dungeons & Dragons there weren’t many options when looking for parts to enhance your game. The hobby was relatively new and the market was just ramping up. You may be thinking, “here we go, another things were better back in the day statement”. Not so. I’m actually stunned, amazed and really happy about where things are for D&D and associated parts of the hobby right now.

Some lucky few of us as kids were able to work for or add to the Christmas list official D&D miniatures. I’ve managed to hang on to those, but I no longer have any of the other things we used to supplement our game. One of the things we used to do was carve up any corrugated cardboard we could lay out hands on and cut them up into various combinations of squares. These flat ’tiles’ became what we used to represent the fabled 10′ x 10′ stone corridor that has become synonymous with classic dungeon crawls. I clearly remember the shoe box of cardboard I had filled with various combinations of corridor or room that could be laid out to show the ‘surroundings’ of the miniatures we were using. The imagination assistance worked really well.

Fast forward to today. There are multiple companies out there now selling every sort of miniature pieces or parts for dungeon masters to layout and confound players with. The pure art of these pieces really is exceptional.

An example of a professional modular set.

It is also expensive. Paying the artists is important, but frequently WAY out of budget range.

Happily, the internet has also provided a way to connect with other people that are just as excited about creating these worlds as I am. There are literally thousands of folks out there coming up with new and imaginative ways to use various bits and pieces from around the house to create these worlds on a budget. I started posting a little while back about my journey back into this, and I’ve gone back to the very basics.

I made up some dungeon tiles.

It’s a very beginner level project. I saw a fellow crafter post something wondering about being proud of simple things, like these beginner projects. One of the most challenging things I’ve found about digging back into this hobby is learning to be patient and go through the various steps toward learning and experience. You don’t get to be a pro on day one. Stack up the lessons… and the dungeon tiles.

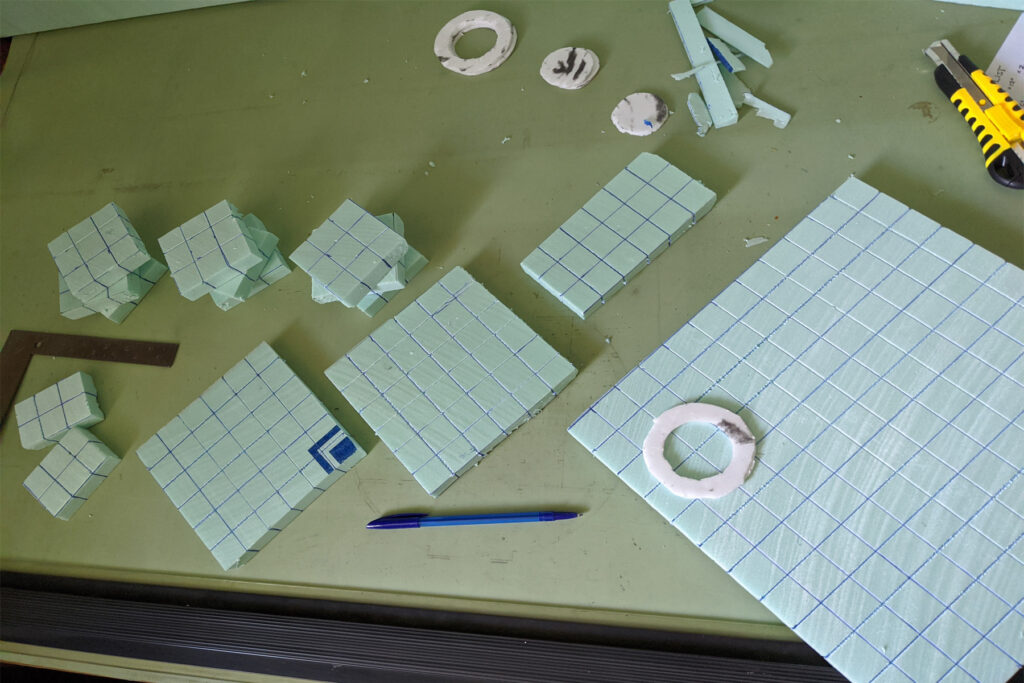
I started off with 1/2” extruded polystyrene insulation board (XPS) and carved up a bunch of shapes that would be my new set of tiles. I did all of this with a metal carpenters square, a pen and a box cutter. No high end, out of the budget stuff here. After carving all those bits up, I understand why crafters go after hot wire cutters and other expensive tools. This was labor intensive. I found that even on my best cuts, I wasn’t necessarily square or plumb. I forged ahead. These were meant to be faux stone after all. Anything carved by hand would have imperfections and odd edges.

Carving out a stack of tiles!

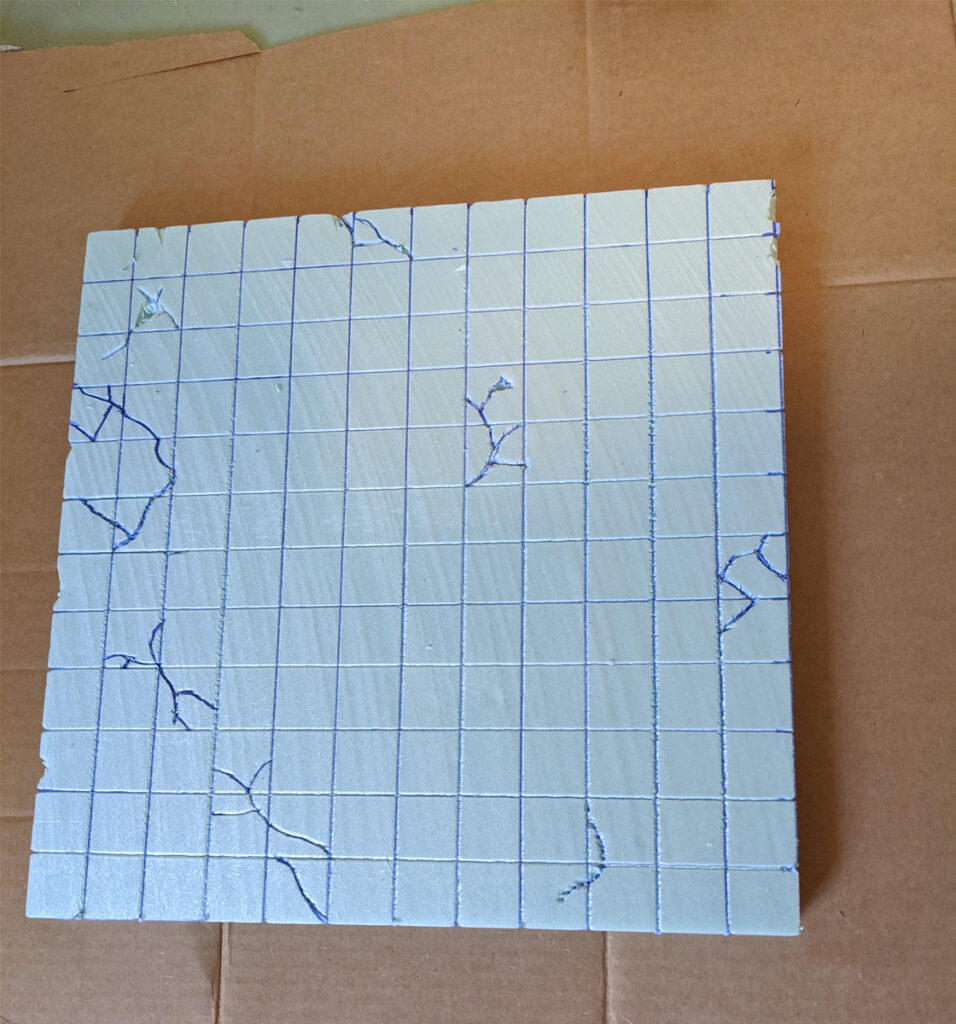
Once all the parts were cut, I laid out a 1” x 1” grid on all the tiles. This is the size of a large number of standard miniature bases and provides a convenient method for estimating distances at scale. I also added in a number of imperfections using the ball point pen. The idea was to gouge the foam. This would allow paint to get into the cracks and show the variations when painted. When I was painting I discovered that I probably needed to apply more pressure when creating my textures and adding cracks. I don’t think I went deep enough in many cases, so the paint mostly filled some of the cracks I made. As a YouTube crafter I follow said, “Crack to taste”. I did. I’ll do better next time.

Crack to taste.

Once all the parts were set it was time to paint. It’s been a long time since I attempted to judge how much paint I might need in order to cover various miniature parts. I managed not to waste too much in my multiple coats. Black was first. I watered down a little bit of straight up black craft paint and covered them all. This would show up as deeper shadows whenever the rest of the paint was applied and didn’t seep down into all the cracks. Just had to wait for it to dry.

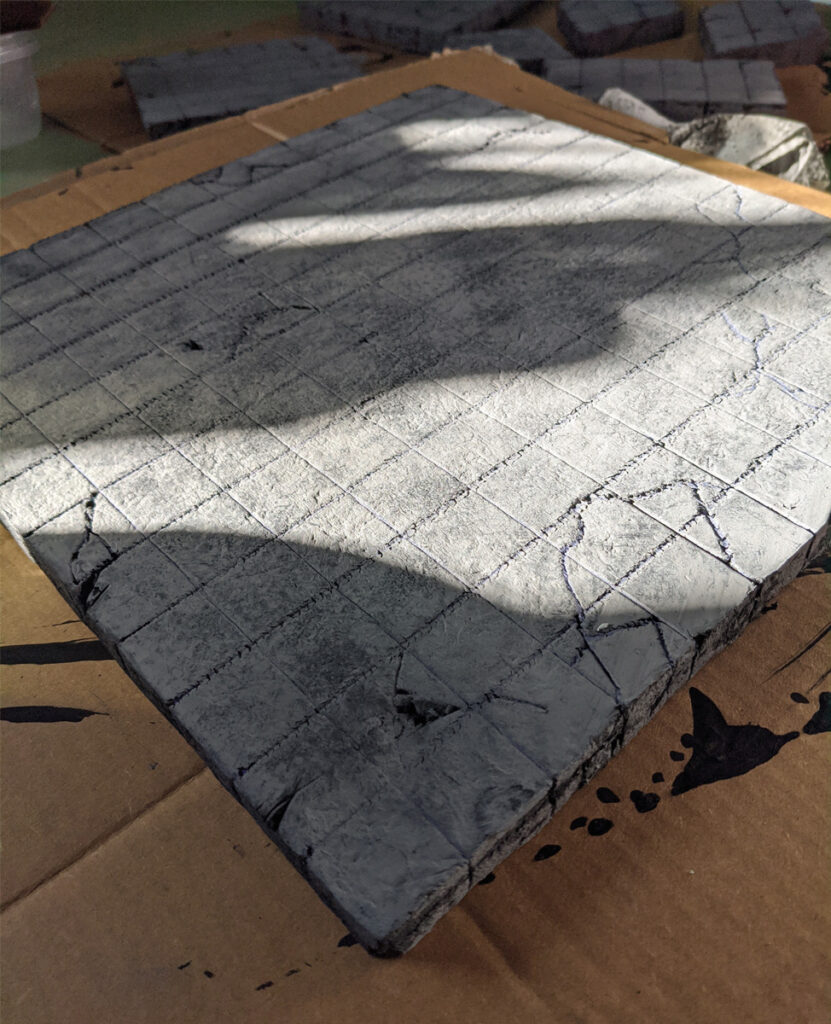
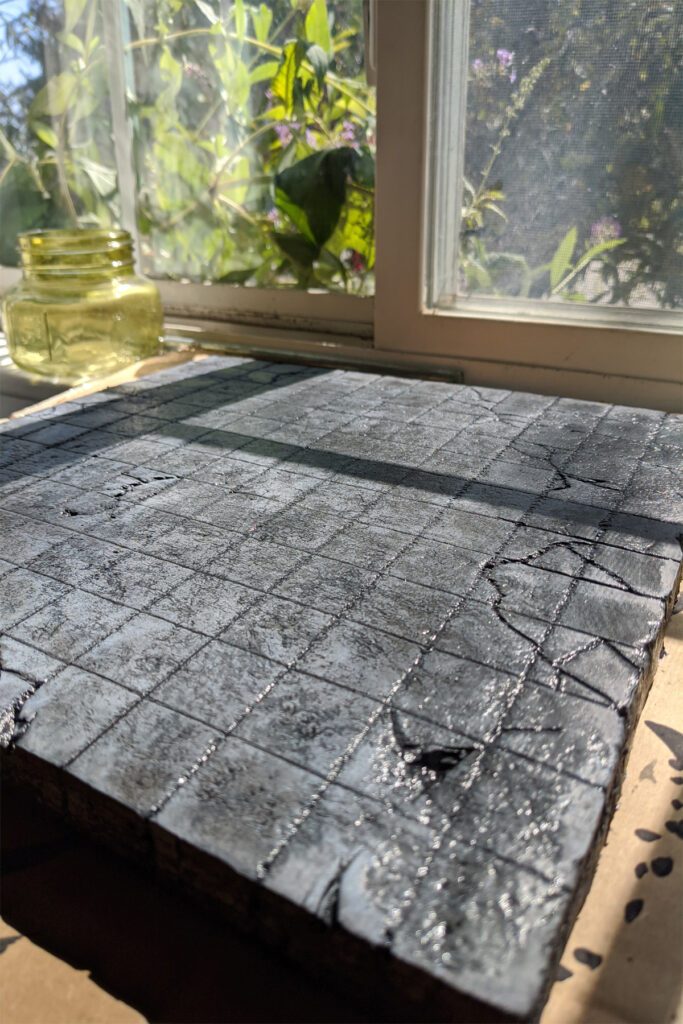
Once that was dry, it was on to a gray coat. This gray was applied pretty heavily. I was afraid that I had over done it when I finished with the gray. Some of the cracks had filled in. It was hard to see the texture. I wasn’t super happy, but I was this far along, I just needed to keep rolling. And wait for it to dry… again.

I thought it was too heavy, or too dark… or too… something.

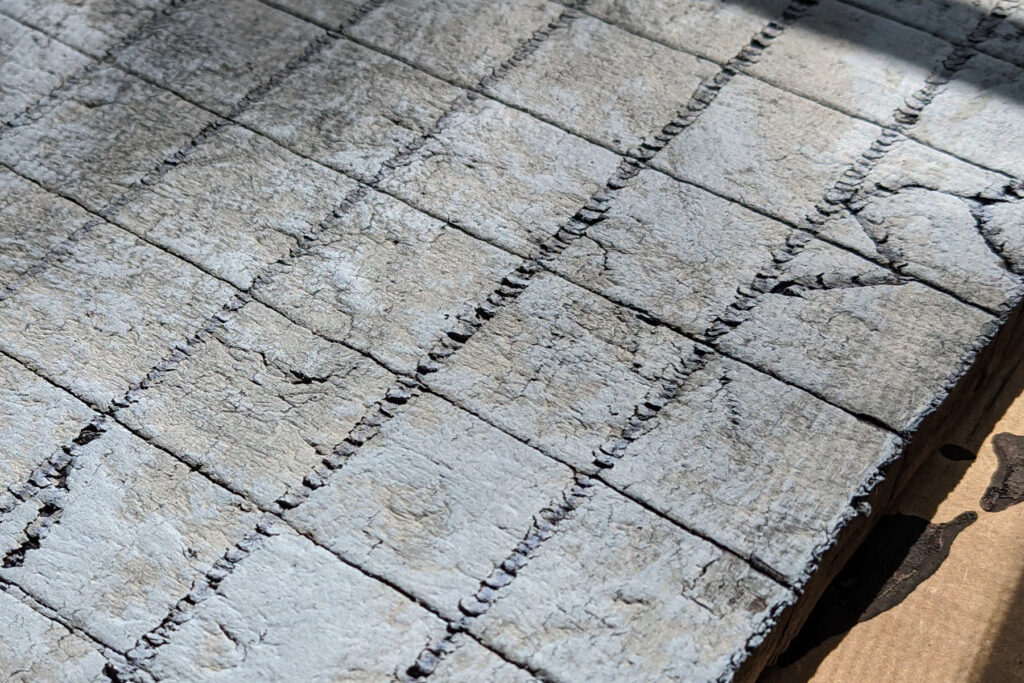
Next up was a dry brush over the high points. I misjudged the amount of paint a couple of times and my brush was not nearly as ‘dry’ as it was supposed to be. I used some paper towel and dabbed the excess back off when I could. I mixed a light (dolphin) gray along with a color called blue stoneware. It gave things a bit of a blueish tint, but that’s OK. It was what I was going for.

The black crisscross pattern is actually the shadow of the window screen

Just had to wait for things to dry… again.

No good…

Once that bit was done, it was on to the wash. Back to black, but super watered down. I forgot to add in any sort of green or brown to add a feel of “grime” to this part, but I was just happy to be moving on. Looking back, I might have wanted to give each step a little more thought. As I said above, nobody’s a pro on day one.

Post wash

As things turned out, I’m a lot happier with them after all the steps were finished. So now it’s just a matter of sealing things up with a glue wash and stacking these up. Ready for my next gaming session! I’m calling this a success and I’m already looking forward to making more stuff.

Have you made anything lately?

Cubed

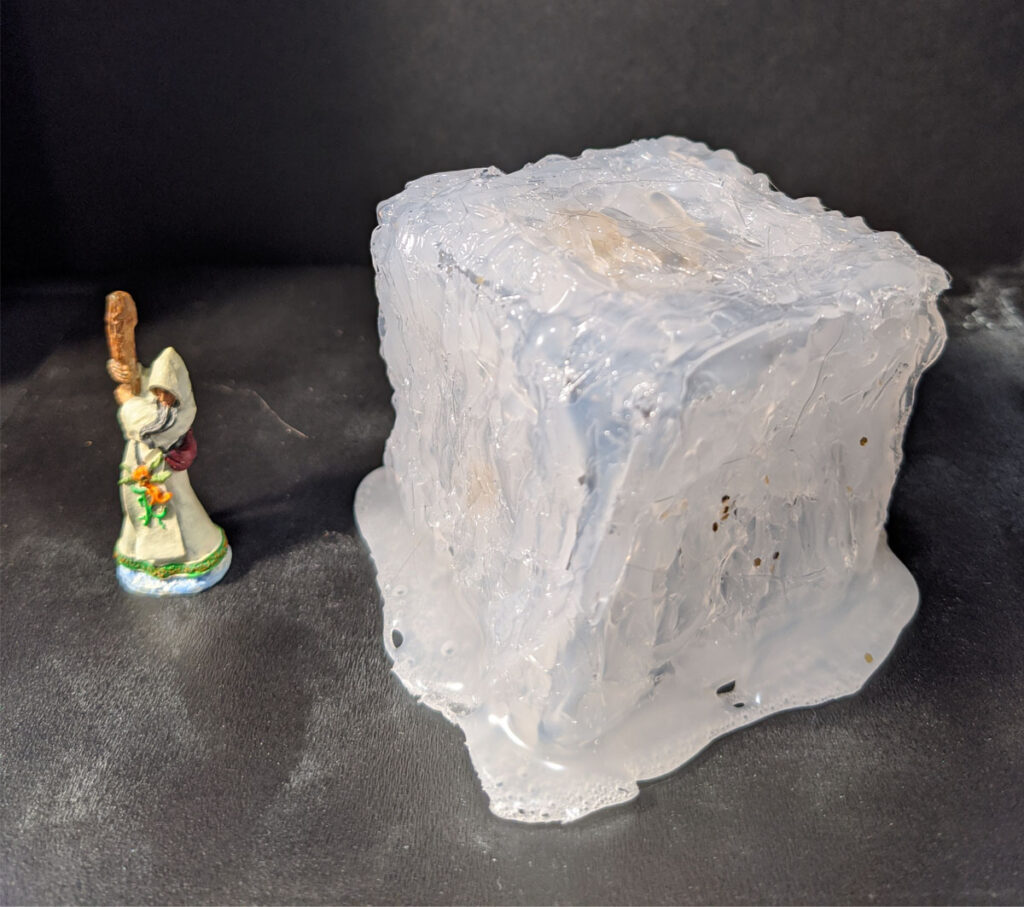
I took on another beginner project today. The tabletop crafting has hold of me and the only method to get away is to actually take on a project and make something. It felt really good to actually start and finish a project. Yes, it was small, but that’s OK. Starting small and learning as you go is how things are supposed to work. Today, I made a version of the Dungeons and Dragons monster the Gelatinous Cube. The monster is essentially a ten foot cube of monster goo that sweeps dungeon corridors and occasionally eats player characters.

It’s a beginner project because it doesn’t require a lot of parts or skill. More skill than I have in order to avoid hurting yourself apparently, but more on that in a minute.

I grabbed an old sheet protector from a three ring binder that had been laying around here collecting dust for far too long. I trimmed out a 6” x 6” section of the plastic. I still have the other side of the sheet protector set aside so if I choose to make this project again I can use that… although I might look for a better solution. Many tutorials say to use “plastic” but they’re not super specific about what that plastic actually is. I think if I try this method again I might want to use plastic that is a little bit heavier. I considered trying to glue together some acrylic picture frame parts to make a cube, but at 1/8” thick it was way too much. It just wouldn’t give the same feel.

Plus

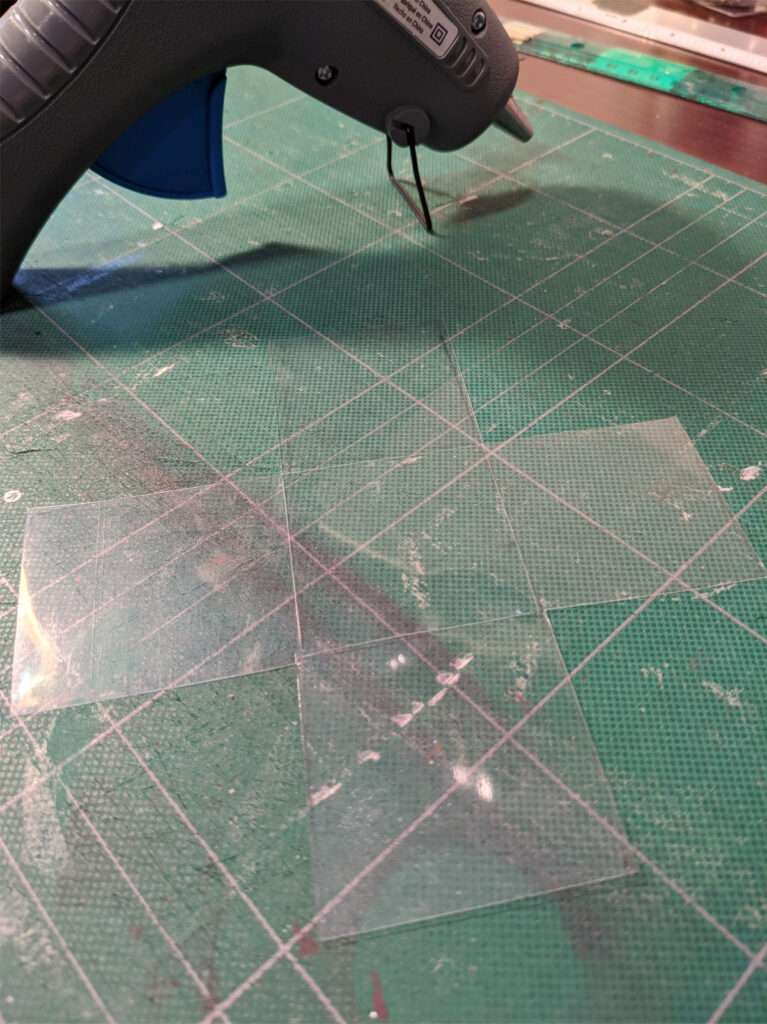
I tried to mark out the shape I needed to cut on the plastic with a marker. It didn’t work well at all. I couldn’t get the ink to stay on the plastic. The idea is to have 2” x 2” sides and a 2” square top. Cutting 2” squares out of the corners of the 6” square should give a “plus” shaped form. Then, where the edges of the 2” top would be, score the plastic but don’t cut through it to help with getting an accurate bend. I couldn’t get the ink marks to stay. It was frustrating. In the end I mostly eyeballed the whole thing. I grabbed my metal straight edge and my xacto knife and got to cutting.

Once the “plus” shape was cut out of the 6” square I laid it flat on my work surface… and that was my next error. I should have put parchment paper under the plastic first. Parchment paper would have kept my project cleaner, would not have picked up the tiny pattern that is actually in the cutting board and would have helped me get the glue to peel away much easier than I did.

Plus with glue

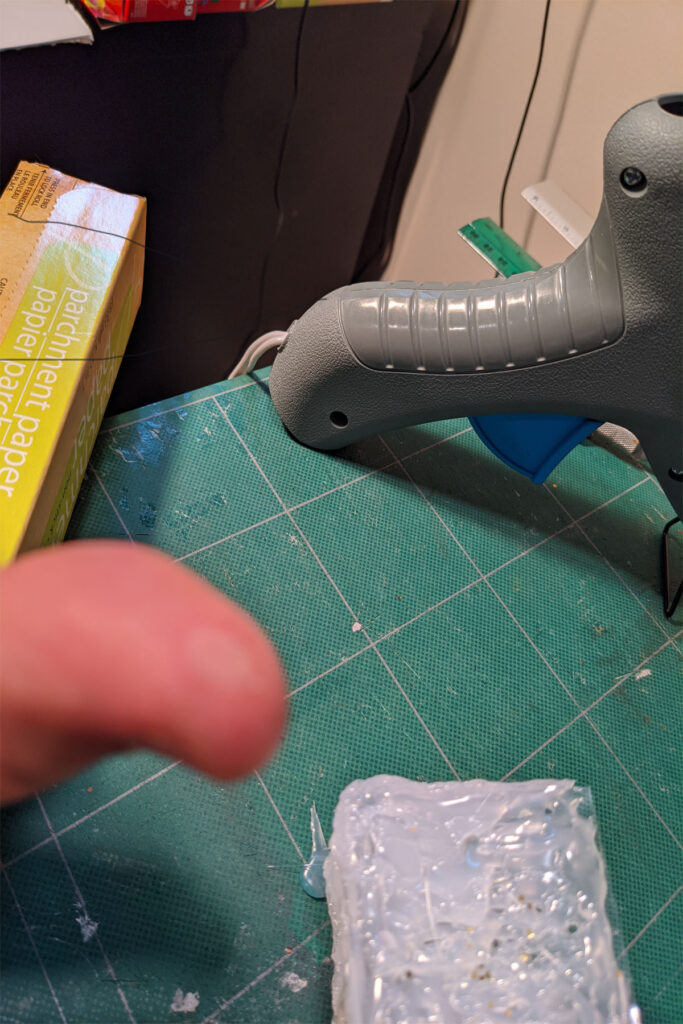
So, adding glue. The errors just kept adding up here. I used the high temp glue gun and I don’t think I needed to. It warped the plastic a little when I was first laying out glue. That’s OK because this monster isn’t supposed to be gelatinous and not a Quadrone (that’s right – a reference to the Modrons from Monster Manual 2 – I’m old). Still, the glue came out hot and fast and I am not practiced at hot glue sculpting yet. There’s an art to using the hot tip of the glue gun to make the glue look the way you want it to. Also, the key word in “hot glue gun” seems to be *hot*. I blistered my thumb when the glue slid off the cube and onto me. I was unhappy. There may have been swearing.

Ow. Blister.

Then came the part that I somehow failed to grasp when thinking about the project. Patience. This would have been a significantly better project if I’d had some patience and didn’t try to rush things. One of my favorite comedy routines has a character named Ed Grubberman. I quote Ed all the time, “Yeah, yeah, yeah, patience… how long does that take?” That’s right before a painful lesson too. Perhaps I should have paid more attention.

I tried to put my own little spin on this project by adding some “floating gold” on the inside. That’s something that is shown in one of the old pictures of this monster. In terms of sweeping up in the dungeon there are frequently bits of things that haven’t been completely dissolved yet. I used some large cut glitter on the inside. It was not quite the effect I wanted. The glue did not dry clear, so it’s hard to see. I may try another after my thumb heals a little ~ but I’ve seen another version of this that uses resin. I am definitely not up to resin yet.

I took this picture with one of my miniatures to give this some scale and context.

Cube size

I will certainly use this when the chance arrives and I can torment some of my players. In the end, I’m actually pretty happy with the end result. I’ll take those lessons learned and take on my next project. Hopefully with less injuries in the process.

What projects have you finished lately?

Miniatures and Crafting

In my author bio one of the things I list is that I am an old school gamer. Along with being an artist (loose, but relatively true). Those two things actually collide in the crafting and miniature painting realm. Because I’m not busy enough.

In all seriousness, Dungeons and Dragons has been a love of mine for a very long time. I play when I can. I world build, I run games, create adventures and… once upon a time I painted miniatures and built terrain to play on. It’s a fantastic creative outlet and doubles up as something to add to my game sessions. It’s also fantastic practice for other kinds of art. the miniatures have always inspired flights of imagination for me.

I’ve started getting back into this. When I was painting miniatures before it was a deeply solitary thing. I found a few others locally that were painting as well, but we never connected really. I didn’t reach an extreme level with my painting, but some of them were pretty nice. I even started trying to build my own layouts and sculpt some things on my own.

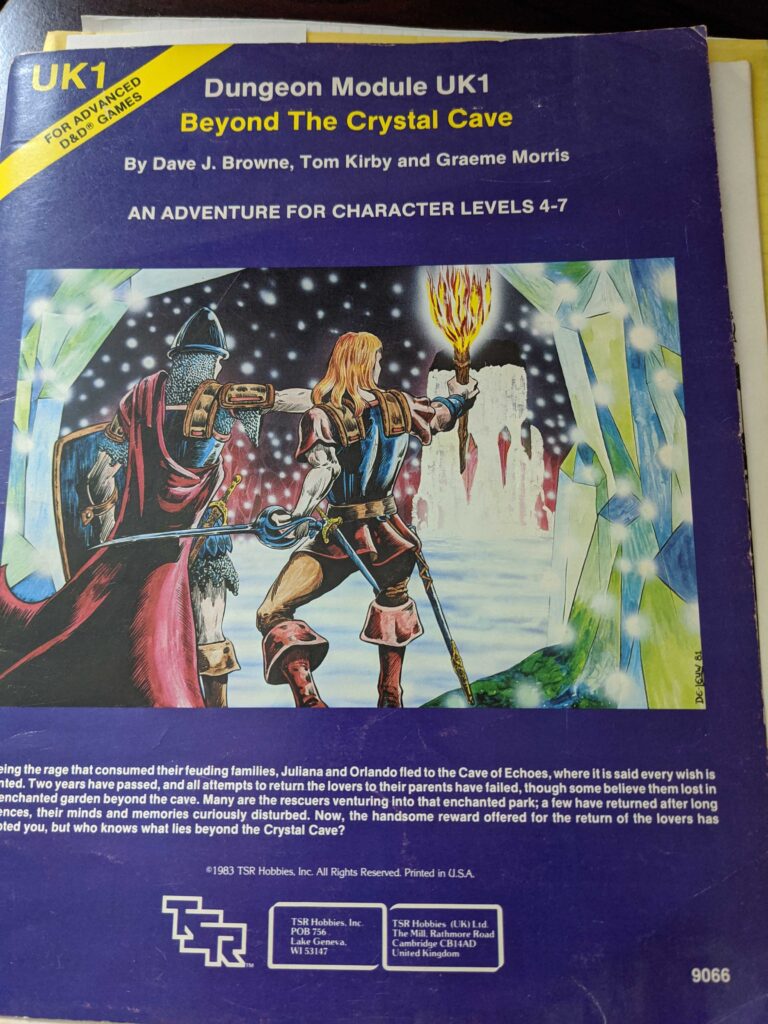
The module with the monster description in it!
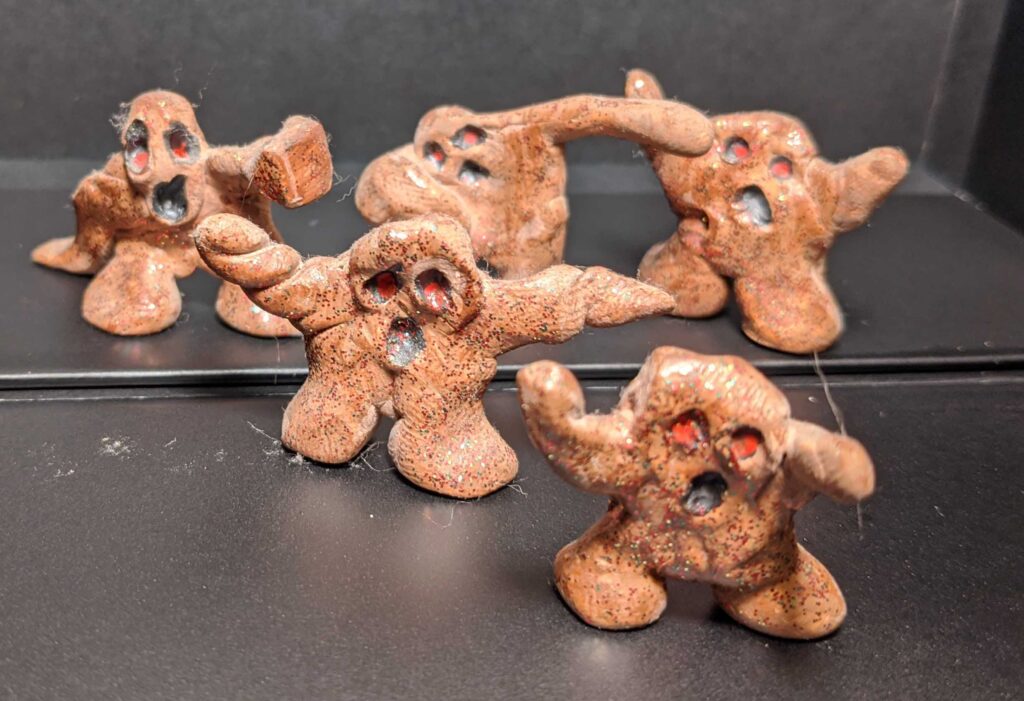
Modeling clay and glitter (because glitter = magic, right?)

I hope to add these projects to the blog here as part of my art. Plans, progress and all the stuff that I do when I’m not actively working on a writing project. I gave a moment of consideration to making this some kind of video compilation, but I am not a video editor. I am at heart an analog kind of guy. I believe that writing and pictures will do what I want to convey the process of the art I create. So – I’ll share progress here as the work takes shape.

I have a list of projects (shocking, I know) and (even more shocking) I have a plan for a major project. I have a diorama that I want to create as a gift to a dear friend. It’s going to be a massive learning curve for me. Hopefully you’ll enjoy the ride.

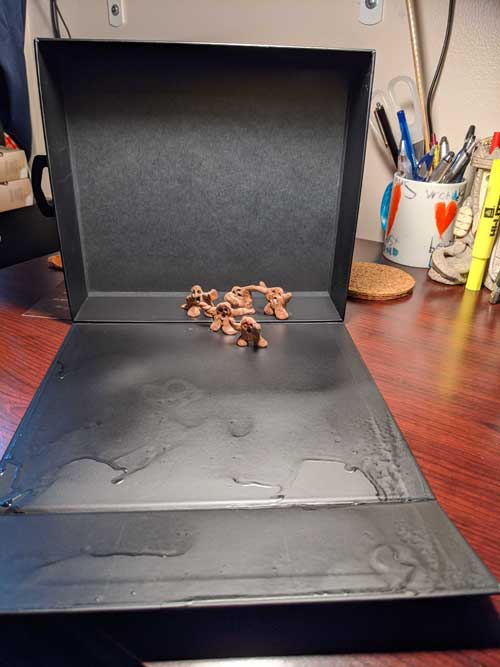
I jumped back into things today. Not some massive art project or novel length writing, just something simple. I had this box laying around from when I got a new set of headphones. I didn’t want to just throw it away. It’s a hard board and has magnets as the closure. It’s quite nice for simple packaging. I decided that I would spray paint over the product information and use this excellent sturdy box as a backdrop for taking individual pictures of my miniatures work. It works ~ that’s what the mud men are standing on / in. Easy peasy for a first project, right?

First lesson – wear your painting gear even if “it’s just a quick little thing” and avoid ruining a shirt.

Second lesson – look at the weather report. Your paint will run if you have to move it / hang it up before it’s dry because it starts to rain (spray painting is not an indoor sport).

It really is a cool box. I’m totally NOT a hoarder… totally.

In the end, I mostly succeeded. I have a painted box to use as a back drop and a single, starting project under my belt.

Do you have anything you’re working on?

Art fun

My wife often participates in a charity event called GISH. It’s a lot of fun for a good cause (or series of good causes). Here’s what they list on their site:

GISH is a scavenger hunt like no other.

We challenge our players to connect, create, have fun, and make a difference in their communities through wild tasks and experiences — all from the brain of Misha Collins!

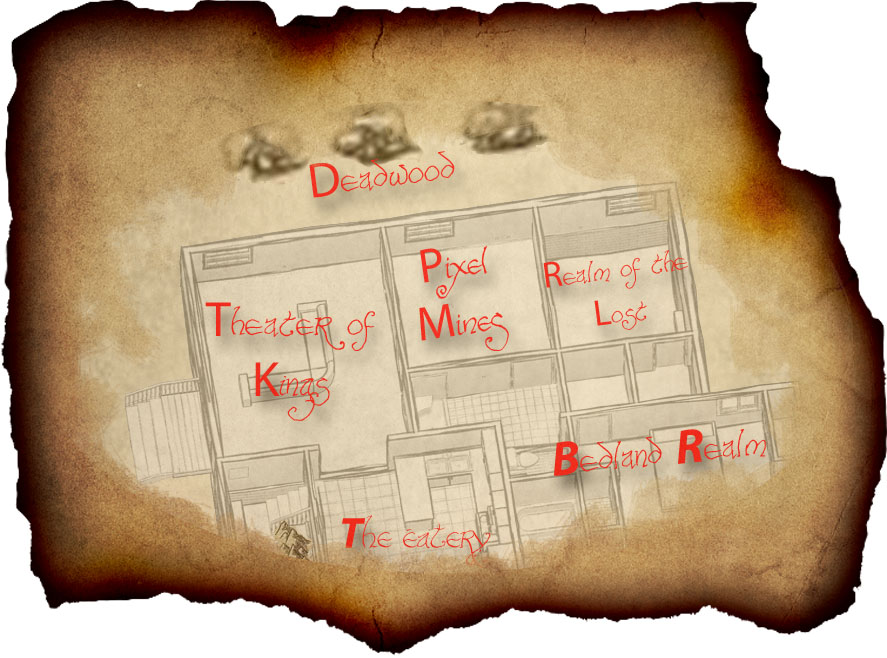
They’ve been conducting a series of one day stay at home scavenger hunts while the world is on lock down. One of the things the scavenger hunt teams needed to come up with was a map of your house as if it was an adventure map like the Hobbits would have had. I have to admit I did have a lot of fun with this one – here’s part of the result:

Failure and Fan Art

It would be easy to call entry into a contest and not winning a failure. Easy, but not true.

I created the picture below to enter into a fan art competition in celebration of the 20th anniversary of the Dresden Files. I really am a big fan. I have read more of this series than I have of any other book series or author out there. Admittedly, some authors I’ve read don’t have as great an amount of work available. There are some that have comparable amounts of work available, but they have not met the standard set by the Dresden Files for me.

I didn’t share this entry before the contest winners were announced. It was not at all about a “jinx” or any other kind of superstition. It was that mean, nasty thing called ‘hope’. IF you’ve got even a little it makes you think things like, “Gee, I don’t want to put this up on my web site where it will be considered ‘published’ before the winners are announced… what if I win and then they want to do a business deal and can’t…”

Intellectually it was very easy to see that I didn’t have much of a chance. I am an amateur artist on a good day. This contest was open to all comers – and there were a lot of them I suspect.

So – I didn’t win – BUT

What I did get was a chance to make art. I like what I made. I am going to make more art. This was a fun little project and I’m very happy with the results. What do you think?

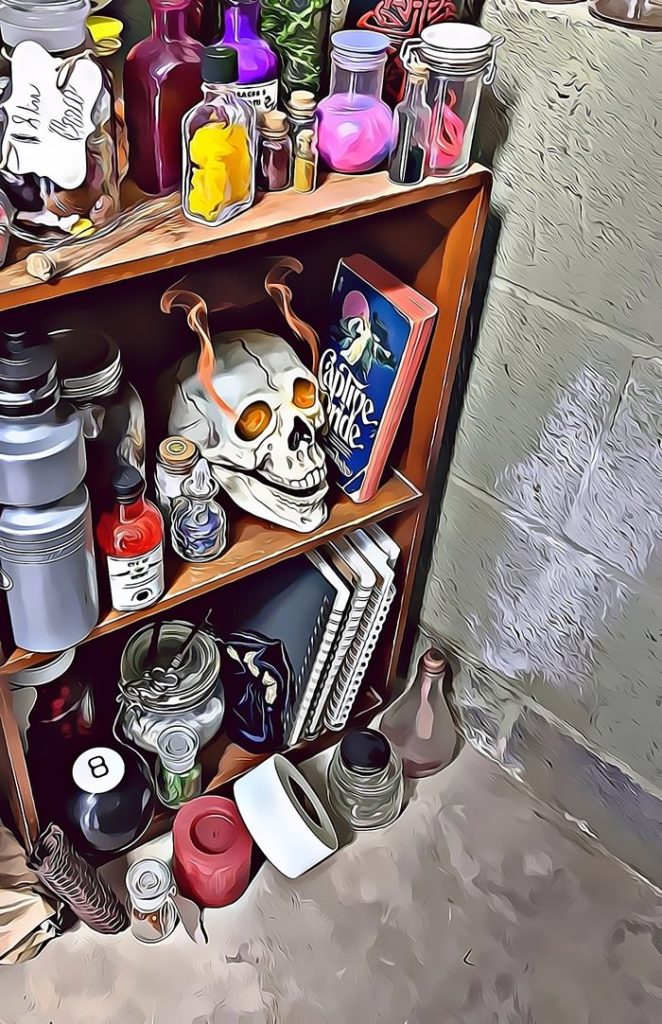
Bob The Skull

Suspense and Re-reading

How do you keep somebody in suspense?

I’ll tell you next Tuesday.

Yes, that’s a bit of an old joke, however it can be effective marketing. It can also be a driver for anxiety. I recently entered some art into a contest. The winners of the contest were supposed to be announced last Tuesday.

I waited. I waited. Then I saw the e-mail announcement from that mailing list pop up on my account. With great trepidation I opened the e-mail.

I’m not much of an artist really. I try, but I don’t have any delusions about my talent level. I don’t actually think I’m going to win anything in this contest… intellectually. Emotionally, there’s the teeny spark of hope. Hope can be cruel, so I try to avoid it. Pragmatism. Planning. Realistic options. But I really like this author’s work and it would be so far beyond super cool to be noticed. I’ve shown my contest entry to a few friends and they all seem to think it’s good.

And now you’re waiting for the big reveal… I opened the e-mail and…

Yeah, I felt that way too.

I opened the e-mail and there was a brief statement about how the winners would be announced after an additional week of deliberation. Remember what I said about hope? Yeah, and the anxiety and then the “ARRGH! Another week?!?” because that sliver of hope, like a splinter in my mind will be hanging around until at least Tuesday. I say at least because there’s a deeply cynical part of my mind that has crept out of the dark corner where it lives to say, “Oh, absolutely… THIS Tuesday… for sure…” followed almost immediately by a mangled quote from Wimpy the guy begging for hamburgers in Popeye, “I’ll gladly pay you Tuesday for a hamburger today…”

The really effective part of the marketing / contest strategy is that I’ve been thinking a lot about the series and attempting to remember specific parts. Discussions with other fans have me thinking things like, when he did what again? Some would be fans have written unflattering reviews and taken on points of view that don’t mesh with how I remember things. Turns out that after a decade or so, I’ve forgotten a lot of the details.

I’m going to go back and do a re-read of the entire Dresden files series. I’m actually going to look up where the short stories fit in along the way too. I hope to have this entire re-read finished up before the new book comes out July 14th of this year. It’s a tall order, but I’m up for the challenge.

Once again time to go read A Restoration of Faith, the story that starts the whole thing.

Oh, and the art? I’ll have to tell you on Tuesday.

Fan Art

I’ve had a couple of posts recently about being a fan and artwork. Turns out those things can come together. Fan Art.

I don’t usually work in other people’s worlds when it comes to writing or art. I’d rather not deal with all the mess that comes along with trying to get permission or paying for rights for use or any of that mess. If I’m making it up, it’s mine.

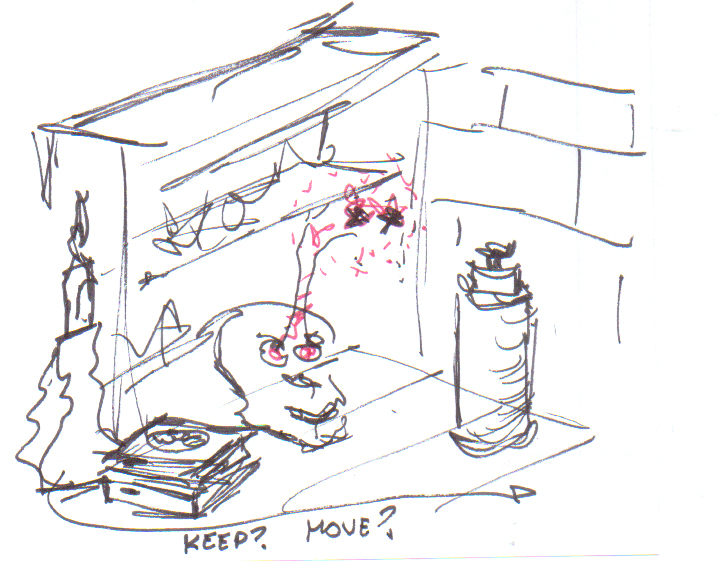
This time it’s different. There was a call put forward for a fan art contest for the Dresden Files. I’ve always created pictures in my mind when reading so this one was something that struck me as particularly “doable”. I had a concept that popped into my head, but no sketch book or anything else really handy (clearly an error in judgement on my part). I reached for whatever I could find and just made myself a note so I could recall what I had thought later.

Not what I would call art...
Original Note

It’s not amazing art – it’s note taking. It’s getting the essence of what I was trying to remember so I could go back and get after it again later. It did what it needed to do.

I’ll share the entries I created after the contest is done. I don’t want to mess up whatever chance I might have by publishing something before it has had a chance to get into the judging.

I’d say ‘fingers crossed’ but it’s really hard to type that way!

Art and Technology

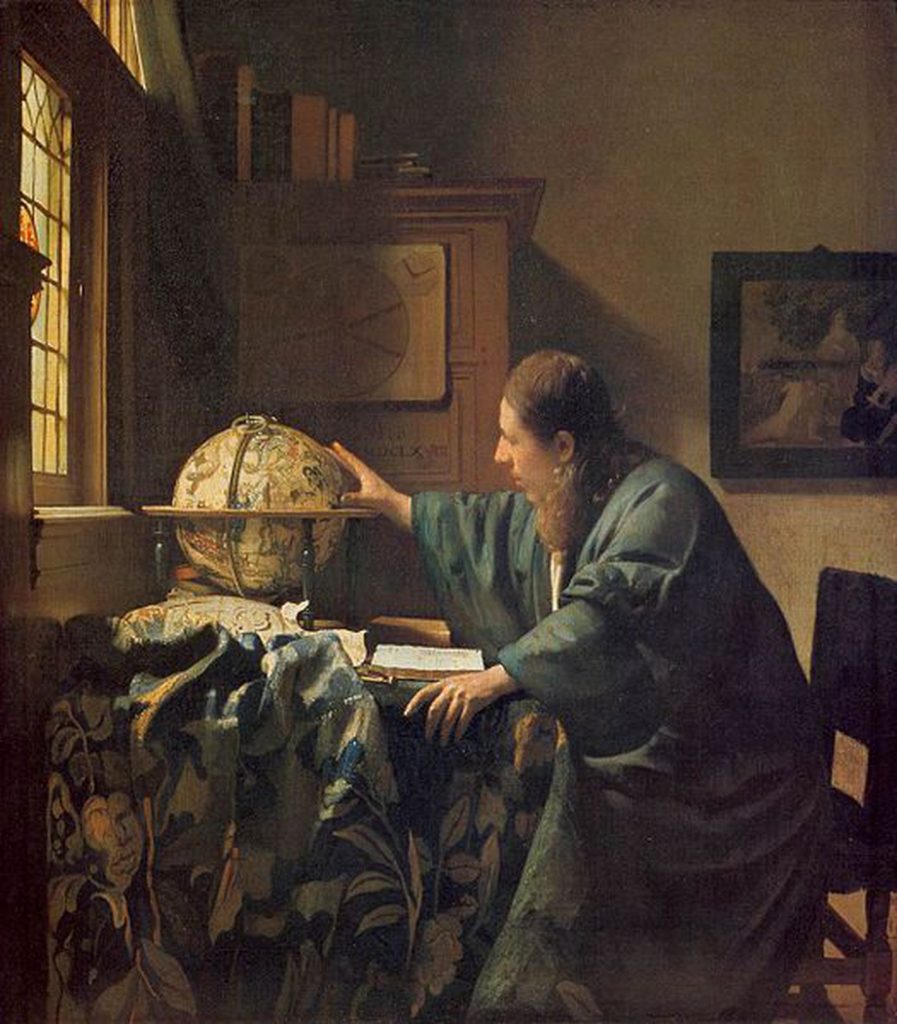
A scientist at work - a fitting subject for this post
The Astronomer by Vermeer

When I put out my mini biography for different publications part of that bio says, “author, artist, fan, usually in that order”. There’s something about knocking together words and attempting to tell a story that really works for me. I love a good story. Thing is, my first love has always been creating art.

Art is by no means easy. Over the course of my life I’ve heard a lot of people talk art down saying things like, “my kid can splash paint around…” or “he just crapped on canvas”. Art is subjective in the purest sense. Things that I love, other people hate. Things I revile have been held up as master works. It’s all still art. Some of it sells, some of it languishes, some of it is created purely for the sake of making art – never meant to be sold or reviewed but simply enjoyed by the creator and those the creator chooses to share with.

I have attempted to create art for many years with varying levels of success. Some digital pieces live here on my web site (and should be updated). Some digital pieces go to the cover art for Watch The Skies (and many should be forgotten). Some pieces live in my sketch books and in my storage area only for me to reference. I am, on a good day, an amateur artist. On a good day. Most days I’m a savagely poor hack, an imitation of what an artist should be. I keep doing it because it was my first love, but for a very long time I have known the frustration of not being able to take the vision in my head and put it forward in a medium that conveys the right look or feel to others. It is frustrating, but I still take a swing at it regularly. You can’t get better if you don’t work at something.

In my professional life I mix the very technical with the artistic on a daily basis. I interpret the designs of napkin sketches and transform them into the reality of the built environment. I use various computer programs to create what does not exist and show it to others. It has taken more than two decades, but I am finally reaching a point where I think the computer programs and the knowledge I have of the built environment have reached a point where I can actually create something truly artistic. I hope, after much more practice to create something memorable.

As it turns out I am not the only person to be interested in this combining of art and technology. I have been meaning to get around to viewing a film called ‘Tim’s Vermeer’ for quite a while. Now that I have had the opportunity to see the film I would highly recommend digging up a copy of this someplace and taking a look if you’re interested in art or technology at all. The subject of the film became obsessed (there is no other word for what he did) with the look and make up of Vermeer‘s paintings. He contended there was some kind of technological aid this most famous of painters used. In order to gather as much proof as he possibly could, he attempted to reconstruct the method for creating a painting he thought was how Vermeer worked. It’s fascinating because when we think of technology we tend to tie the concept specifically with the ultra modern. This experiment is all conducted using methods that would have been available when Vermeer was working – around the year 1650. I was amazed to see the result and the rediscovery of technological innovation after more than 350 years.

If you’re at all interested in seeing what I’m talking about, the trailer for the film is here. As is frequently the case I found inspiration in this study of art. I’m off to attempt to create more art.